Writing a raytracer in DOS
12/Aug 2016
TL;DR; It’s not as hard as people think! Full source code on GitHub.
Disclaimer: this is not a step-by-step introduction to raytracing, rather the fundamental components I needed to get it working in DOS. Sorry! 🙂 Check out the GitHub link if you’d rather jump straight into implementation details. And now, with that out of the way...
Some time ago, I decided to finally write my first raytracer, seeing it as such a hot topic in realistic computer graphics. If you look around, you’ll find tons of examples on how to accomplish this. The task is even simpler if you only want to focus on primitive shapes such as spheres and planes, so for a moderately skilled programmer a basic raytracer shouldn’t take too much time to implement. Since that doesn’t sound too exciting, I figured I’d raise the bar a bit and write the entire thing for DOS and VGA graphics – the platform I never get to truly code on when I was younger!
1. Figuring out VGA screen access
Raytracing is all about calculating final color of each pixel on the screen. This intuitively makes us want to be able to manipulate each pixel in some nice, linear fashion. With modern APIs you can easily achieve this by accessing texture data, in DOS things get a bit more complicated. This is where mode 13h comes in!
Depending on the graphics mode, a sequence of consecutive pixels on the screen can be accessed in different ways. In mode 13h you get access to the start address of screen memory and from there you can get to entire screen data as if it were an array of pixels:
// pointer to VGA memory in mode 13h
unsigned char *VGA = (unsigned char *)0xA0000000L;

static const int SCREEN_WIDTH  = 320;
static const int SCREEN_HEIGHT = 200;

int main()
{
    // set graphics mode 13h
    _asm {
            mov ah, 0x00
            mov al, 0x13
            int 10h
    }

    for (x = 0; x < SCREEN_WIDTH; x++)
    {
        for (y = 0; y < SCREEN_HEIGHT; y++)
        {
            /*
                Fetch pixel color here
            */

            // draw the pixel!
            VGA[(y << 8) + (y << 6) + x] = pixelColor;
        }
    }
}
Setting pixelColor to an integral value in the range [0-255] will fill entire screen with respective color from VGA palette (more on that later). A good start! Now to get some actual raytracing done. 🙂
2. The Raytracing
One excellent property of mathematical principles is that they can be applied to any programming language and platform, now matter how old or obsucre it is. Here, it’s no different – in order to start off with raytracing, we need some basic representation of the shapes we want to put in the scene – planes and spheres in this particular case. We will also need to represent the ray itself to perform the tracing (and to make surface bouncing a bit easier):
typedef struct
{
    Vector3f m_origin;
    Vector3f m_dir;
} Ray;

typedef struct
{
    Vector3f m_origin;
    double  m_radius;
    int     m_reflective; // sphere is reflective - 1/0
    int     m_refractive; // sphere is refractive - 1/0
    double  m_color[3];   // RGB of the sphere
} Sphere;

typedef struct
{
    Vector3f m_normal;
    double   m_distance;
    int      m_reflective; // plane is reflective - 1/0
    double   m_color[3];   // RGB of the sphere
} Plane;


// scene we're going to raytrace
typedef struct
{
    Sphere spheres[NUM_SPHERES];
    Plane  planes[NUM_PLANES];
    Vector3f lightPos;  // light source position
} Scene;

/* see dt_trace.c on Github repo for implementation details of the following functions */
Vector3f reflect(const Ray *r, const Vector3f *normal);
Vector3f refract(const Ray *r, const Vector3f *normal);
double intersectSphere(const Ray *r, const Sphere *s, Vector3f *oIntersectPoint);
double intersectPlane(const Ray *r, const Plane *p, Vector3f *oIntersectPoint);

// raytracing function
int rayTrace(const Ray *r, const Scene *s, const void *currObject, int x, int y);
The structs should be self explanatory – every object is defined by the minimum amount of information needed to represent it mathematically. We also define a set of functions to perform reflection, refraction and intersection checks as well as the rayTrace function which will recursively call itself to determine where the ray eventually hits. Playing around with reflection and refraction is not an issue either, since like everything else it can be easilly determined with math. The final code will be written in C, so we’re using integers to store boolean flags (though some will likely argue it’s a waste of space and a plain char or a short would suffice!). With all of the above implemented, I was able to trace my first sphere:
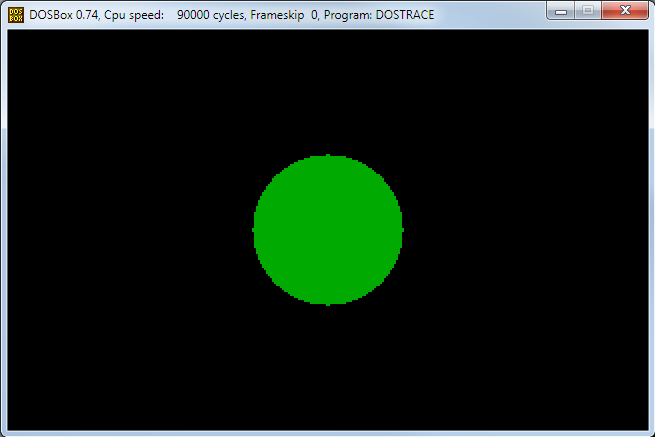
First render of a solid, raytraced sphere.
3. Shading in VGA
Having mastered rendering of geometry, it was time to add some light and shading to the scene. In modern graphics doing that is (mostly) trivial – all color calculcations can be easily done using the RGB channels, so it’s pretty straightforward to get the final pixel with all light sources accounted for. With VGA things are a bit more involved, since instead of RGB we’re operating with palettes.
Without going into too much detail, a VGA palette is a set of 256 integers (starting with 0), each one representing a single color out of the available pool of 256 different values. One may wonder at first how was 256 colors enough “back in the day” and most certainly a lot of games looked like they could handle a lot more than that! When DOS programming was still a big thing, there were number of tricks circulating in the game industry. Palette swapping, color cycling and the fact that you could create your own palettes made it possible to fool people into believing they see a lot more colors than what standard VGA could provide. Different graphics mode had also different capabilities and some games were notorious for switching between them to get higher screen resolutions and more color values (Bullfrog’s “Syndicate” was such an example). However, I digress...

Standard VGA palette. Courtesy of Wikipedia.
For the purpose of this demonstration I decided to use the standard VGA palette. For the the available test scene Lambert shading was sufficient and pretty easy to implement. The only problem to solve was getting RGB values for each color and its respective palette index. One way to do this is to create a simple mapping array:
// standard Lambert shading (see dt_trace.c for implementation details)
// iRGB - input color
// oRGB - output color calculated with the consideration of light pos and normal vector
void lambertShade(const Vector3f *light, const Vector3f *normal,
                  const double *iRGB, double *oRGB);

// RGB values of default VGA palette (mode 13h)

int VGAPalette[][3] = {
  // R     G     B      // pal index - color
  { 0x00, 0x00, 0x00 }, // 0 - black
  { 0x00, 0x00, 0xAA }, // 1 - dark blue
  { 0x00, 0xAA, 0x00 }, // 2 - dark green
  { 0x00, 0xAA, 0xAA }, // 3 - dark cyan
  // all remaining colors go here
  (...)
  { 0x00, 0x00, 0x00 }  // 255 - black
};
So far so good! But considering that Lambert shading properly determines the final color, how do we map it back to a palette index to display it properly on the screen? One (naive) way to do it is to search for the color closest matching the RGB values of the final, calculated pixel and return its index in the VGA palette which will give us the “highest fidelity” using standard colors. This is called finding the Euclidean distance between two points, only in this case we’re not matching the (x, y, z) coordinates bur rather the (R, G, B) values of two different colors. The one with smallest “distance” to the desired source color will have its indexed in VGA palette returned:
// color quantisation using Euclidean distance
// srcColor is a set of 3 doubles: R,G and B values respectively
int findColor(const double *srcColor)
{
    // define max Euclidean distance as 3 * 256^2 + 1
    long int nd = 196609L;
    int i, palIdx = 0;

    // cycle through the entire palette and find color closest to srcColor's RGB
    for (i = 0; i < 256; i++)
    {
        long int r = (long int)(srcColor[0] - (double)VGAPalette[i][0]);
        long int g = (long int)(srcColor[1] - (double)VGAPalette[i][1]);
        long int b = (long int)(srcColor[2] - (double)VGAPalette[i][2]);

        // sqrt() not needed: it won't change the final evaluation
        long int d = r * r + g * g + b * b;

        if (d < nd)
        {
            nd = d;
            palIdx = i;
        }
    }

    return palIdx;
}
There are several optimizations that could be used to improve search speed of the nearest color. First, there are duplicated colors in the palette, so it’s not really necessary to search through the entire 256 array of values. Second, remember we’re using the standard VGA palette, so all colors are pretty much scattered through the entire range of 256 values. To make the lookup faster, one way would be to create your own palette with all similar colors placed right next to each other. Using custom palettes is also encouraged, since it gives you the possibility to tweak what the user sees on the screen and as such can improve the quality of final image.
Putting all of the components together and adding a lightsource was now enough to produce the following result:
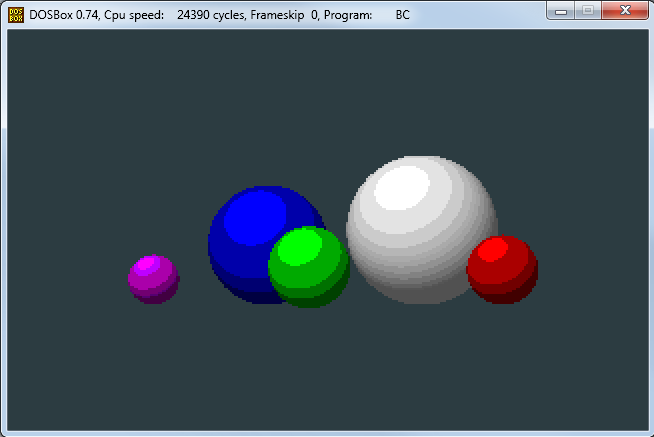
Notice how the white sphere seems to look better than the others – this is due to there being 16 shades of gray in the standard VGA palette.
4. Final result
The beauty of work I did up until this point is that it made everything “just work” as you’d expect it (provided of course that refraction and reflection functions were implemented correctly). With just a little work of creating a new scene, adding planes to it and setting some reflection and refraction attributes, I was able to come up with the following image:
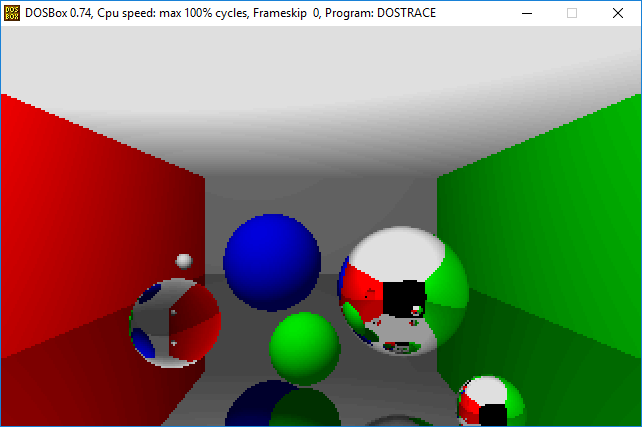
Final rendered image with reflective and refractive surfaces.
It doesn’t stop there, though! Full source code on GitHub also comes with a simple implementation of dither to further improve image quality. To read more about VGA programming, check out David Brackeen’s website which was a major help in writing my code!
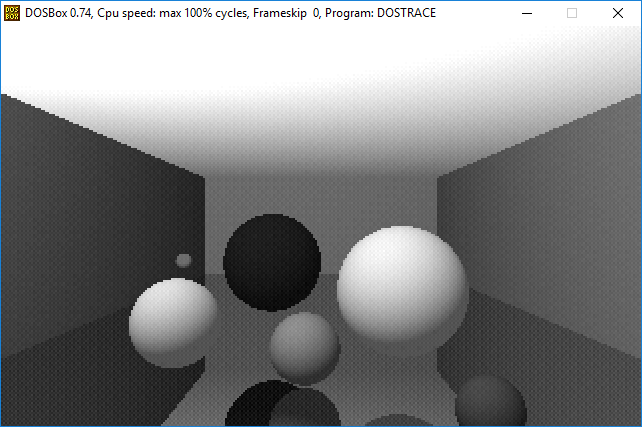
Dithered grayscale image. Higher “spectrum” of shadow values is a result of 16 different shades of gray being stored in standard VGA palette and the addition of dither.